Best Yoga Mat Bags to Buy in July 2026
Gaiam Cargo Yoga Mat Bag, Full-Zipper Yoga Mat Carrier with Adjustable Strap, Front & Exterior Phone Pocket with Earbuds Slit, Stylish & Functional Fitness Mat Holder for Women & Men
- EFFORTLESSLY CARRY YOUR MAT; STAY CLEAN AND ORGANIZED ON THE GO.
- FULL-LENGTH ZIPPER FOR QUICK ACCESS TO YOUR MAT AND ESSENTIALS.
- AMPLE POCKETS KEEP YOUR GEAR ORGANIZED, INCLUDING TANGLE-FREE STORAGE.


ELENTURE Canvas Yoga Mat Bag with Adjustable Strap & Pockets, Full-Zip Travel Gym Tote for Women & Men, Fits 1/4" & 1/3" Thick Mats, Lightweight Carrier for Yoga, Workout, Outdoor Use
- EFFORTLESS PORTABILITY: ADJUSTABLE STRAP FOR EASY TRANSPORT ON-THE-GO.
- SPACIOUS & ORGANIZED: LARGE POCKET FITS ESSENTIALS-STAY PREPARED ANYTIME!
- DURABLE & STYLISH: HIGH-QUALITY CANVAS, PERFECT GIFT FOR FITNESS LOVERS!
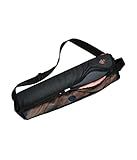
Manduka Yoga Commuter Mat Carrier - Eco-Friendly Cotton, Easy to Carry, Hands-Free, For All Mat Sizes, Black, 68" x 1.5"
- ECO-FRIENDLY DESIGN: SUSTAINABLE MATERIALS FOR A GUILT-FREE WORKOUT.
- ULTIMATE COMFORT: PADDED SHOULDER STRAP FOR EASY TRAVEL TO CLASSES.
- SIMPLE USE: NOISE-FREE GRAVITY CINCH FOR SEAMLESS PRACTICE ON THE GO.
Manduka Yoga Breathe Easy Mat Carrier - Lightweight, Breathable Mesh with Zipper Closure, Easy to Carry, Hands-Free, Black, 1 EA, 26.5” x 6.5” x 6.5”
- SLEEK, LIGHTWEIGHT DESIGN FOR EASY TRANSPORT OF YOUR YOGA MAT.
- BREATHABLE MATERIAL KEEPS YOUR FITNESS ESSENTIALS FRESH ON THE GO.
- FITS MOST SMALL TO MEDIUM MATS, INCLUDING POPULAR BRANDS FOR CONVENIENCE.
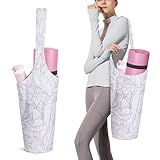
IwIeIaIrI Yoga Mat Bag - Gym Accessories For Women,Large Exercise Mat Straps Yoga Bags And Carriers Fits Most Your Workout Stuff
- EFFORTLESS CARRY: SPACIOUS SHOULDER BAG WITH WATER BOTTLE POCKET.
- DURABLE DESIGN: HIGH-QUALITY OXFORD FABRIC ENSURES LONG-LASTING USE.
- VERSATILE GIFT: STYLISH COLORS MAKE IT PERFECT FOR YOGA LOVERS!
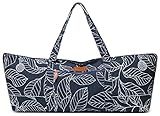
ELENTURE Large Yoga Mat Bag for Women Men, Travel Gym Bag for Pilates Office Beach Workout, Yoga Mat Tote Carrier with Mat Strap for 1/4" 1/2" Thick Exercise Yoga Mat
- VERSATILE YOGA BAG: PERFECT FOR STUDIO, GYM, TRAVEL, AND DAILY USE.
- SPACIOUS DESIGN: FITS STANDARD MATS, WATER BOTTLES, AND ESSENTIALS.
- STYLISH & DURABLE: FASHIONABLE LOOK WITH HIGH-QUALITY MATERIALS.
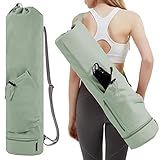
sportsnew Yoga Mat Bag with Water Bottle Pocket and Bottom Wet Pocket, Exercise Yoga Mat Carrier Multi-Functional Storage Bag, Green,Patent pending
-
LARGER CAPACITY: FITS YOGA MATS UP TO 69L X 23W WITH EASE.
-
WET POCKET: KEEP ESSENTIALS ORGANIZED AND SEPARATE IN A WATERPROOF BAG.
-
CONVENIENT STORAGE: EXTRA POCKETS FOR QUICK ACCESS TO YOUR VALUABLES.
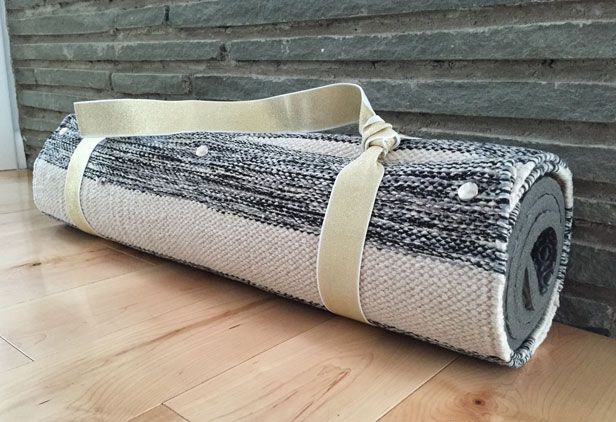
Making a yoga mat carry bag is a relatively simple and enjoyable sewing project. Here's a step-by-step guide to help you create your own yoga mat carry bag:
- First, gather all the necessary materials. You will need fabric (canvas, nylon, or any durable material), coordinating thread, a sewing machine, scissors, a ruler, a measuring tape, pins, and a cord or strap for the bag closure.
- Begin by measuring your yoga mat. Lay it flat and measure its length and circumference. Add a few extra inches to these measurements to ensure the bag will fit comfortably.
- Fold the fabric in half, with the right sides facing each other. Start by sewing the side seam. Using the sewing machine, stitch along the side edge, leaving the top and bottom open. Make sure to backstitch at the beginning and end for added durability.
- Turn the fabric right side out to reveal the main part of the bag. Lay it flat with the seam in the middle.
- Measure and mark the location for the drawstring closure. Measure down from the top edge of the bag about 8-10 inches and mark this spot on both sides.
- Cut two small slits on both sides of the bag, aligned with the marked spots. These slits should be large enough to thread the cord or strap through.
- Once the slits are made, insert the cord or strap through one side and out the other, creating a loop that will serve as the bag's closure. Make sure to leave enough length on both ends to tie a knot.
- To secure the cord or strap in place, sew a straight stitch across the slits on both sides. This will help keep the closure securely attached to the bag.
- Now, fold the bottom edge of the bag about one inch up towards the inside of the bag. Pin it in place.
- Sew along the pinned edge to create a clean, finished look for the bag's base.
- Finally, turn the bag inside out and give it a good press with an iron to smooth out any wrinkles or creases.
Congrats! You have successfully made your own yoga mat carry bag. Slide your yoga mat into the bag, tighten the drawstring closure, and you are all set to carry your mat wherever you go. Enjoy your yoga practice!
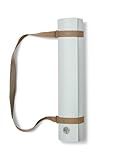
How can I add a carrying handle to the bag?
Adding a carrying handle to a bag can be done in a few easy steps. Here's a simple method to add a basic carrying handle:
- Gather the materials: A sturdy material for the handle, such as webbing, leather, or nylon strap. A ruler or measuring tape. Scissors or a utility knife. Heavy-duty thread or twine. A sewing machine or needle and thimble.
- Measure and cut the handle material: Decide on the desired length of the handle based on your preferences and the bag's dimensions. Cut the handle material to the desired length, keeping in mind that it will be folded in half, so double the length needed.
- Attach the handle ends: Fold one end of the handle material over itself by about an inch. Position the folded end where you want the handle to be attached, keeping in mind the weight and balance of the bag. Sew the folded end securely in place using a sewing machine or by hand stitching with heavy-duty thread. Repeat this process on the other end of the handle, ensuring it is aligned symmetrically with the first attachment.
- Reinforce the handle: To ensure a strong and durable handle, sew a rectangular box shape around the handle attachment points. This means stitching a square with an "X" through it or sewing parallel lines at the top and bottom of the handle attachment points.
- Test the handle: Once the handle is securely attached, hold the bag using the handle and check if it feels comfortable and sturdy. Test it with a moderate amount of weight to ensure it can bear the load without any tearing or discomfort.
Remember, this is a basic method for adding a carrying handle. If you have more specialized requirements or a complex bag design, you may need to consult a professional or adjust the process accordingly.
Are there any specific sewing techniques I need to know for this project?
It would be helpful to know which specific project you are referring to in order to provide the most relevant answer. Sewing techniques can vary depending on the complexity and type of project. However, here are a few common sewing techniques that can be beneficial in many sewing projects:
- Understanding patterns: Learn how to read and understand patterns, including marking, cutting, and transferring pattern markings onto fabric.
- Sewing straight seams: Master sewing straight seams using a sewing machine or by hand, ensuring stitches are even and secure.
- Hemming: Learn how to hem fabric, which involves folding and securing the raw edge to create a clean finish.
- Sewing darts: Darts are folded triangular tucks used to shape fabric. Practice sewing darts accurately for a better fit.
- Making gathers: Gathers are small, controlled folds of fabric used to create fullness. Learn different methods to create gathers effectively.
- Installing zippers: Depending on your project, knowing how to install different types of zippers, such as regular, invisible, or exposed, can be useful.
- Sewing buttonholes: If your project includes closures, such as buttons, it's essential to learn how to sew buttonholes with a sewing machine or manually.
- Topstitching: Topstitching is visible stitching done on the fabric's right side, often used for decorative purposes or securing edges. Practice sewing straight, even topstitching.
Remember that the specific techniques required may vary depending on the project you are working on. It's always beneficial to consult the pattern instructions or project guidelines for any specific techniques or stitches required.