Best Wrist Bandage Techniques to Buy in July 2026
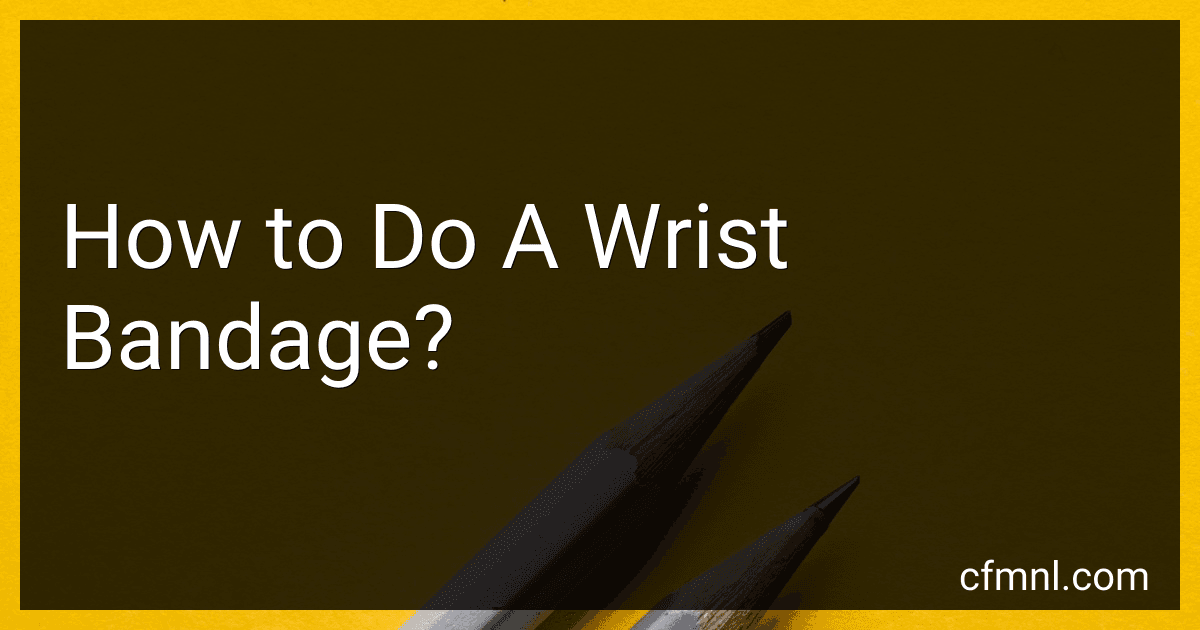
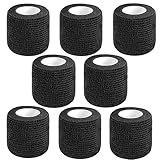
High-Performance Elastic Bandage Wrap - 6 Pack (2x2in, 2x3in, 2x4in) - Self-Closing Strong Compression Bandage Wrap for Feet, Ankles, Wrists, and Knees
-
VARIETY OF SIZES: SIX ROLLS IN 2, 3, AND 4 FOR ALL INJURY NEEDS.
-
QUICK CLOSURE SYSTEM: STRONG HOOK-AND-LOOP FOR EMERGENCIES, NO CLIPS!
-
DURABLE & REUSABLE: HIGH-QUALITY MATERIALS ENSURE LONG-LASTING SUPPORT.


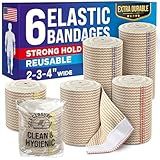
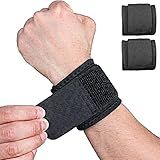
HiRui 2 Pack Wrist Compression Strap and Wrist Brace Sport Wrist Support for Fitness, Weightlifting, Tendonitis, Carpal Tunnel Arthritis, Pain Relief-Wear Anywhere-Adjustable (Black)
- PROTECT AND STABILIZE YOUR WRISTS WITH ADJUSTABLE, GENTLE COMPRESSION!
- DURABLE, BREATHABLE MATERIAL ENSURES COMFORT AND REDUCES EXCESSIVE MOTION.
- LIGHTWEIGHT, PORTABLE DESIGN PERFECT FOR ATHLETES AND DAILY ACTIVITIES!
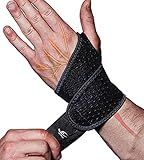
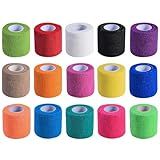
OK TAPE Self Adherent Cohesive Bandages Wrap - 12Packs, 2" x 5 Yards, Non-Woven Self Adhesive Bandage Wrap for Thumb, Finger, Wrist, Ankle, Vet Wrap Bandages Tape (Mixed Colors)
-
SECURE ADHESION WITHOUT MESS - STICKS FIRMLY, NO CLIPS OR TAPE NEEDED.
-
CONVENIENT TEAR & USE - EASY TO TEAR, HYGIENIC, AND NO SCISSORS REQUIRED.
-
VERSATILE FOR ALL - IDEAL FOR HUMANS AND PETS, SUPPORTS DIVERSE NEEDS.
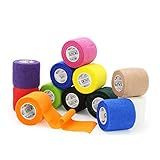
CIYAGPOOU Self Adhesive Bandage Wrap,2 Inch Black Breathable Elastic Cohesive Bandages, Vet Wrap Sports Tape Bulk for First Aid Supplies, Wrist Sprains Protection
- SELF-ADHESIVE COMFORT: STICKS TO ITSELF, NOT YOUR SKIN OR FUR.
- VERSATILE USE: PERFECT FOR PETS & PEOPLE; 2X5 YARDS IN 8 ROLLS.
- WATER-RESISTANT & BREATHABLE: IDEAL FOR HEALING, STAYS SECURE EVEN WHEN WET.
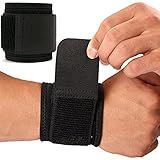
YUNYILAN 2 Pack Wrist Brace Adjustable Wrist Support Wrist Straps for Fitness Weightlifting, Tendonitis, Carpal Tunnel Arthritis, Wrist Wraps Wrist Pain Relief Highly Elastic (Black)
- RELIEVES WRIST PAIN WITH TARGETED COMPRESSION FOR QUICK RECOVERY.
- BREATHABLE, DURABLE FABRIC KEEPS YOUR WRIST DRY AND COMFORTABLE.
- FLEXIBLE DESIGN FOR ALL AGES; SUPPORTS VARIOUS WRIST INJURIES.
Wrist Brace, 2 PACK Wrist Wraps for Carpal Tunnel for women and men. Wrist Straps for Weightlifting, Working Out and Pain Relief. Flexible, Highly Elastic, Adjustable, Comfortable and Multi-Functional
- VERSATILE FIT: EASILY WORN ON EITHER HAND; PERFECT FOR ALL AGES.
- ECO-FRIENDLY COMFORT: BREATHABLE, NON-ODOR MATERIAL KEEPS SKIN DRY.
- SATISFACTION GUARANTEED: LOVE IT OR YOUR MONEY BACK, RISK-FREE!
KISEER 15 Pack 2 Inch x 5 Yards Self Adhesive Bandage Breathable Cohesive Bandage Wrap Rolls Elastic Self-Adherent Tape for Stretch Athletic, Sports, Wrist, Ankle
-
SOFT, BREATHABLE MATERIAL ENSURES COMFORT FOR SKIN AND PETS ALIKE.
-
VERSATILE USE FOR WOUNDS, SPRAINS, AND EVERYDAY SORENESS RELIEF.
-
SELF-ADHESIVE AND EASY TO TEAR-NO SCISSORS NEEDED! PERFECTLY PORTABLE.

Doctor Developed Wrist Brace, Wrist Wraps for Carpal Tunnel Arthritis, Tendonitis, Hand Support, Ideal for Fitness, Weightlifting - Handbook Included (Wrist Brace 1 Pack)
- ALL-DAY SUPPORT FOR SPORTS, WORK, AND DAILY ACTIVITIES.
- SECURE STRAP SYSTEM FOR OPTIMAL WRIST SUPPORT, LEFT & RIGHT HAND.
- LIGHTWEIGHT & COMPACT-PERFECT FOR ON-THE-GO LIFESTYLES!
ACE Brand Adjustable Compression Wrist Support, Moderate Support for Weak, Sore or Injured Joints, Wrist Support Conforms to Wrist, One Size Fits Most
-
ADJUSTABLE COMPRESSION FOR CUSTOM SUPPORT AND PAIN RELIEF.
-
LOW-PROFILE DESIGN ENSURES COMFORT DURING ANY ACTIVITY.
-
BREATHABLE, ODOR-RESISTANT MATERIAL KEEPS YOU COOL AND DRY.
CURAD Performance Series IRONMAN Antibacterial Bandages, Extreme Hold Adhesive Technology, Finger & Knuckle Bandages, Flexible Fabric, Variety Pack with Assorted Sizes & Colors, 50 Count
- EXTREME-HOLD ADHESIVE ENSURES RELIABLE SUPPORT FOR CUTS AND SCRAPES.
- ANTIBACTERIAL PADDING PREVENTS INFECTIONS WHILE PROVIDING COMFORT.
- TOUGH YET FLEXIBLE FABRIC CONFORMS TO MOVEMENTS FOR SECURE COVERAGE.
To begin, gather all necessary materials including a conforming bandage and a safety pin. Start by placing the end of the bandage at the base of the thumb and wrap it around the wrist twice to secure it in place. Continue wrapping the bandage in a figure-eight pattern, overlapping each layer by half. Make sure not to wrap too tightly as it can restrict blood flow. Secure the end of the bandage with a safety pin and adjust as needed for comfort and support. Finally, check that the wrist is properly supported and that the bandage is secure before completing the process.
How to choose the right compression level for a wrist bandage?
When choosing the right compression level for a wrist bandage, it is important to keep the following factors in mind:
- Severity of the injury: The level of compression needed will depend on the severity of the injury. For minor sprains or strains, a lower compression level may be sufficient, while more serious injuries may require higher levels of compression.
- Comfort: It is important to choose a compression level that provides the right amount of support and compression without causing discomfort or restricting movement. A bandage that is too tight can cut off circulation and cause discomfort, while one that is too loose may not provide enough support.
- Activity level: Consider your activity level and how much support you will need during physical activity. If you are going to be engaging in high-intensity activities that put a lot of strain on your wrist, you may need a higher level of compression for added support.
- Personal preference: Some people may prefer a tighter compression level for added support, while others may find a lower compression level more comfortable. It is important to choose a compression level that feels right for you and meets your specific needs.
- Consult a healthcare professional: If you are unsure about what compression level is right for your injury, it is always best to consult with a healthcare professional. They can provide guidance on the best level of compression to ensure proper healing and support for your wrist.
How to maintain flexibility in your wrist while wearing a bandage?
- Perform regular wrist stretches: Take breaks throughout the day to stretch your wrist gently. You can do simple wrist stretches like wrist circles, wrist flexor stretches, wrist extensor stretches, and wrist rotations to maintain flexibility in your wrist.
- Use a wrist brace or splint: If you are wearing a bandage due to an injury, consider using a wrist brace or splint instead. These devices provide support and stability to your wrist while still allowing for some natural movement and flexibility.
- Stay active: While wearing a bandage, it is important to stay active and continue with your regular activities as much as possible. This will help prevent stiffness and maintain flexibility in your wrist.
- Apply heat therapy: Applying heat therapy to your wrist can help relax the muscles, improve blood circulation, and promote flexibility. You can use a warm compress or soak your wrist in warm water for a few minutes.
- Seek physical therapy: If you are facing difficulty maintaining flexibility in your wrist while wearing a bandage, consider seeking the help of a physical therapist. They can provide you with exercises and techniques to improve flexibility and strength in your wrist.
How to avoid discomfort when wearing a wrist bandage?
- Make sure the wrist bandage is the correct size and fit for your wrist. It should be snug, but not too tight that it restricts blood flow.
- Adjust the bandage properly so it provides support and stability to your wrist without causing any discomfort. It should be securely fastened, but not too tight.
- Wear a thin cotton sleeve or under-wrap underneath the bandage to prevent chafing and irritation on your skin.
- Take breaks from wearing the wrist bandage throughout the day to allow your skin to breathe and reduce any discomfort.
- Avoid activities that exacerbate the discomfort, such as repetitive movements or excessive strain on the wrist.
- If the discomfort persists, consult a healthcare professional or a physiotherapist for advice on proper use of the bandage and to address any underlying issues causing the discomfort.