
Best Wrist Support Bandages to Buy in July 2026
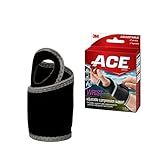
ACE Brand Adjustable Compression Wrist Support, Moderate Support for Weak, Sore or Injured Joints, Wrist Support Conforms to Wrist, One Size Fits Most
-
ADJUSTABLE COMPRESSION FOR COMFORT AND SUPPORT DURING ACTIVITIES.
-
FLEXIBLE DESIGN ALLOWS FULL RANGE OF MOTION WHILE WEARING.
-
BREATHABLE, ODOR-RESISTANT MATERIAL KEEPS YOU COOL AND DRY.


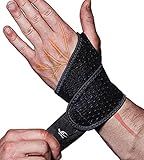
HiRui 2 Pack Wrist Compression Strap and Wrist Brace Sport Wrist Support for Fitness, Weightlifting, Tendonitis, Carpal Tunnel Arthritis, Pain Relief-Wear Anywhere-Adjustable (Black)
- STABILIZE & PROTECT WRIST WITH ADJUSTABLE, COMFORTABLE COMPRESSION.
- DURABLE NEOPRENE BLEND ENSURES WARMTH AND SUPPORT DURING WORKOUTS.
- VERSATILE FOR SPORTS & DAILY TASKS; FITS MOST WRIST SIZES EASILY.
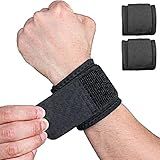
YUNYILAN 2 Pack Wrist Brace Adjustable Wrist Support Wrist Straps for Fitness Weightlifting, Tendonitis, Carpal Tunnel Arthritis, Wrist Wraps Wrist Pain Relief Highly Elastic (Black)
- PAIN RELIEF & SUPPORT: ALLEVIATES SORENESS, IDEAL FOR SPORT & REST.
- COMFORTABLE FIT: ELASTIC DESIGN ENSURES ALL-DAY WEAR WITHOUT DISCOMFORT.
- DURABLE & BREATHABLE: KEEPS WRISTS DRY AND ODOR-FREE FOR ULTIMATE PERFORMANCE.
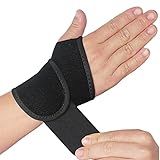
YUNYILAN Wrist Brace Wrist Wraps for Carpal Tunnel 2 Pack Wrist Brace Compression Straps Hand Support, Adjustable Wrist Support for Arthritis and Tendinitis, Joint Pain Relief (Black)
- COMFORT & SUPPORT: IDEAL FOR INJURY RECOVERY AND SPORTS ACTIVITIES.
- BREATHABLE MATERIAL: HIGH-QUALITY NEOPRENE KEEPS YOU DRY AND PROTECTED.
- ADJUSTABLE FIT: ONE SIZE FITS MOST FOR ALL AGES AND ACTIVITY LEVELS.

Gulf W 2Pack Version Profession Wrist Support, Adjustable Strap Reversible Wrist Brace for Sports Protecting/Tendonitis Pain Relief/Carpal Tunnel/Arthritis/Injury Recovery, Right&Left
- COMFORTABLE, ADJUSTABLE FIT FOR ALL AGES-PERFECT WRIST SUPPORT!
- DURABLE, BREATHABLE MATERIALS ENSURE LONG-LASTING WRIST PROTECTION.
- ERGONOMIC DESIGN ENHANCES HEALING AND REDUCES PAIN FOR QUICK RECOVERY.
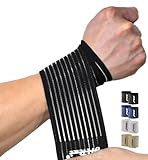
HiRui 2-Pack High-Elastic Wrist Support Straps Wrist Compression Bandage - Wrist Wraps Wristbands for Carpal Tunnel Arthritis Tendonitis Weightlifting Tennis Basketball - Breathable Soft (Black)
-
ULTIMATE COMFORT: BREATHABLE, SOFT MATERIALS FOR ALL-DAY WEAR.
-
VERSATILE SUPPORT: IDEAL FOR SPORTS AND CONDITIONS LIKE CARPAL TUNNEL.
-
DURABLE QUALITY: HIGH-ELASTIC MATERIALS ENSURE LASTING SUPPORT AND RESILIENCE.

ACE Night Wrist Sleep Support, Adjustable, Blue, Helps Provide Relief from Symptoms of Carpal Tunnel Syndrome, and other Wrist Injuries
- ALLEVIATE WRIST PAIN OVERNIGHT WITH ACE NIGHT WRIST SLEEP SUPPORT!
- COMFORTABLE DESIGN ENSURES SECURE, NEUTRAL WRIST POSITIONING DURING SLEEP.
- VERSATILE, ONE-SIZE-FITS-MOST SUPPORT FOR BOTH LEFT AND RIGHT WRISTS.
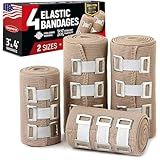
Premium Elastic Bandage Wrap - 4pk (2x3in, 2x4in) + 12 Extra Clips - Strong Compression Bandage Wrap for Wrists, Ankles, Feet and Knees
- VERSATILE SIZES: INCLUDES 3 AND 4 WRAPS FOR ALL INJURY TYPES.
- SUPERIOR SUPPORT: ADJUSTABLE TENSION REDUCES SWELLING EFFECTIVELY.
- HYGIENIC PACKAGING: EACH BANDAGE IS INDIVIDUALLY WRAPPED FOR SAFETY.
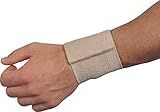
Flex Aid Wrist Support Wrap- Elastic Support with Loop- Wrist Brace for Carpal Tunnel, Arthritis, Tendonitis, Exercise, Weight Lifting, Calisthenics and More- One Size
- ADJUSTABLE COMPRESSION FOR UNMATCHED COMFORT AND WRIST SUPPORT.
- VERSATILE USE: PERFECT FOR WORKOUTS, ARTHRITIS, AND DAILY ACTIVITIES.
- EASY TO USE AND WASHABLE FOR LONG-LASTING, RELIABLE SUPPORT.
To bandage a wrist for support, start by placing a strip of adhesive tape or a pre-wrap around the wrist to provide a base layer. Then, wrap an elastic bandage around the wrist in a figure-eight pattern, making sure to overlap the edges slightly with each pass. Make sure the bandage is snug but not too tight to ensure proper support without cutting off circulation. Finish by securing the end of the bandage with tape or clips. Remember to seek medical advice if you are unsure about how to properly bandage your wrist or if you experience ongoing pain or discomfort.
How to wrap a wrist for support without restricting movement?
- Start by gathering the materials you will need, including a self-adhesive elastic bandage or a stretchy fabric bandage, scissors, and athletic tape (optional).
- Hold the end of the bandage against the inner side of your wrist, just above the wrist joint.
- Wrap the bandage around your wrist in a spiral pattern, overlapping each layer by half of the width of the previous layer. Make sure to keep the bandage snug, but not too tight, as you wrap.
- Continue wrapping the bandage up your forearm and back down to your wrist, covering the joint and providing support to the surrounding muscles and tendons.
- Secure the end of the bandage with athletic tape, if necessary, to prevent it from unraveling during physical activity.
- Make sure the bandage is comfortable and does not restrict your range of motion. You should be able to move your wrist freely while still feeling supported.
- If you experience any pain, numbness, or tingling while wearing the bandage, loosen it immediately and seek medical attention if necessary.
- To remove the bandage, simply unwrap it in the opposite direction of how you applied it.
Remember to consult with a healthcare professional if you are unsure of how to properly wrap your wrist for support without restricting movement.
How to wrap a wrist for support while typing or using a computer?
Here is a step-by-step guide on how to wrap your wrist for support while typing or using a computer:
- Start by measuring the length of the wrist bandage you will need. You can do this by wrapping the bandage around your wrist and securing it with tape where it meets the end of the bandage.
- Place your hand palm side up and position the bandage at the lower part of your palm.
- Wrap the bandage around your wrist in a figure-eight pattern, crossing over the palm of your hand and then around the back of your hand. Make sure to keep the bandage snug but not too tight.
- Continue wrapping the bandage around your wrist, overlapping each layer slightly to provide extra support.
- Once you have wrapped the bandage around your wrist several times, secure the end with tape or a clip.
- Make sure the bandage is comfortable and allows for full range of motion while still providing support to your wrist.
- If you experience any pain or discomfort while typing or using the computer, adjust the bandage as needed or consult a healthcare professional for further guidance.
How to care for a wrist bandage to ensure longevity?
To ensure the longevity of a wrist bandage, follow these care tips:
- Hand wash the bandage in warm water with mild soap. Avoid using harsh chemicals or bleach, as they can weaken the fabric.
- Rinse the bandage thoroughly to remove all soap residue.
- Gently squeeze out excess water from the bandage, but do not twist or wring it out.
- Lay the bandage flat to air dry. Do not put it in the dryer, as high heat can damage the fabric.
- Store the bandage in a clean, dry place when not in use to prevent mold and mildew growth.
- Avoid exposing the bandage to excessive sweat or moisture, as this can cause it to break down faster.
- Check the bandage regularly for signs of wear and tear, such as fraying or stretching. If any damage is found, replace the bandage to ensure proper support and protection for your wrist.
By following these care tips, you can extend the life of your wrist bandage and continue to use it effectively for longer periods of time.
What is the best way to adjust a wrist bandage for a snug fit?
- Start by wrapping the wrist bandage around the wrist, making sure the end of the bandage is on the inside of the wrist.
- Pull the bandage snugly around the wrist, making sure it is not too tight or too loose.
- Use the Velcro or clips to secure the bandage in place, making sure it is comfortably tight but not cutting off circulation.
- Check that the bandage is securely in place and does not slip or move around.
- If the bandage feels too tight or too loose, loosen or tighten it accordingly until it fits snugly and comfortably.
- Make sure to re-adjust the bandage as needed throughout the day, especially if it becomes too loose or shifts position.
What is the correct tension to apply when bandaging a wrist?
The correct tension to apply when bandaging a wrist is firm, but not too tight. The bandage should be snug enough to provide support and compression, but not so tight that it restricts blood flow or causes discomfort. It is important to regularly check the wrist while bandaged to ensure that it is not too tight. If there are any signs of swelling, numbness, tingling, or discoloration, the bandage should be loosened immediately.