Best Ankle Support Tapes to Buy in July 2026
ADMITRY Athletic Tape,5 Pack White Sports Tape,Very Strong No Sticky Residue Wrist Ankle Tape for Gymnastics Boxing Lacrosse Climbing Hockey Bat
- LATEX-FREE COMFORT: IDEAL FOR THERAPY, ENSURING SAFETY AND COMFORT.
- CONVENIENT 5-ROLL PACK: PORTABLE, PERFECT FOR SHARING WITH FRIENDS.
- EASY HAND TEAR: STRONG YET EFFORTLESSLY TEARABLE FOR ON-THE-GO USE.


Hampton Adams | As Seen on Shark Tank | Orignial Athletic Sports Tape (3-Pack) | 45ft Rolls | Very Strong Easy Tear NO Sticky Residue | Best Tape for Athlete & Trainers | Fingers Ankles Wrist (Black)
-
NO SKIN RESIDUE: PROPRIETARY ADHESIVE FOR EASY REMOVAL POST-WORKOUT.
-
EFFORTLESS USE: TEAR WITH FINGERS-NO SCISSORS NEEDED FOR QUICK WRAPS.
-
DURABLE GRIP: SUPER STICKY HOLDS STRONG FOR ALL SPORTS AND ACTIVITIES.
Kinesiology Tape Pro Athletic Sports (3 Rolls,60 Precut Strips) Waterproof Breathable Latex Free Tape for Ankle Wrists Knees Elastic Running Tennis Swimming Football Sports Activities Tapes (Mix)
-
COMFORTABLE & SAFE: 100% COTTON, HYPOALLERGENIC, AND DRUG-FREE SUPPORT.
-
DURABLE & WATERPROOF: STRONG ADHESION FOR WORKOUTS, SWIMMING, AND SHOWERS.
-
EASY APPLICATION: PRECUT STRIPS WITH ADJUSTABLE STRENGTH FOR ALL USERS.
KT Tape, Original Cotton, Elastic Kinesiology Athletic Tape, 20 Count, 10” Precut Strips, Black
- SELF-APPLY KT TAPE FOR INSTANT RELIEF FROM VARIOUS PAIN TYPES.
- VERSATILE APPLICATION FOR BACK, KNEE, SHOULDER, AND MORE CONDITIONS.
- CUSTOMIZE TAPE SIZE FOR A PERFECT, PERSONALIZED FIT EVERY TIME.
CKeep Uncut Kinesiology Tape(2 Rolls), Original Cotton Elastic Premium Athletic Tape,Latex Free Hypoallergenic, 2inch x 16ft, Beige
- BOOST ATHLETIC PERFORMANCE WITH ELASTIC, BREATHABLE KINESIOLOGY TAPE.
- HYPOALLERGENIC, LATEX-FREE, PERFECT FOR SENSITIVE SKIN USERS.
- TRUSTED BY PROS, EASY TO REMOVE WITH BABY OIL FOR A HASSLE-FREE EXPERIENCE.
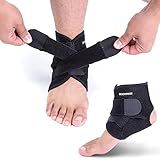
Bodyprox Ankle Support Brace, Breathable Neoprene Sleeve, Adjustable Wrap! (1 Pack)
- UNIVERSAL FIT: ONE SIZE FITS ALL WITH 7.8 TO 11 ARCH CIRCUMFERENCE.
- INJURY PREVENTION: PROTECTS ANKLES AND REDUCES INJURY RISK DURING ACTIVITIES.
- COMFORT & SUPPORT: BREATHABLE NEOPRENE OFFERS RELIEF FOR CHRONIC PAIN.
StrengthTape Ankle/Foot Kinesiology Taping Kit
- SUPPORTS MUSCLES & JOINTS, ENSURING FULL RANGE OF MOTION.
- WATERPROOF & LASTS 5-7 DAYS; 2 APPLICATIONS FOR 14 DAYS TOTAL.
- EASY-TO-USE, PRECUT TAPE FOR QUICK APPLICATION AND RELIEF.
Taping your ankle for support is a common method used by athletes and individuals who have experienced ankle injuries in the past. It helps to provide stability and prevent reinjury during physical activities.
To tape your ankle for support, you will need athletic tape, pre-wrap, and scissors. Start by wrapping a piece of pre-wrap around your ankle to protect your skin from irritation. Then, tear off a piece of athletic tape and wrap it once around the base of your foot. From there, start wrapping the tape in a figure-eight pattern around your ankle, making sure to cover the heel and arch of your foot for added support.
Continue wrapping the tape around your ankle, making sure to overlap the previous layer by about half. Be sure to pull the tape tight enough to provide support, but not so tight that it cuts off circulation or causes discomfort. Finish by tearing off the tape and securing the end with a final piece of tape or wrapping.
Remember to practice proper ankle taping techniques to ensure a secure fit and maximum support. If you are unsure of how to tape your ankle correctly, consult with a sports medicine professional or physical therapist for guidance.
What is the correct technique for ankle taping?
The correct technique for ankle taping involves the following steps:
- Start by cleaning and drying the ankle area to ensure the tape adheres properly.
- Apply pre-wrap or underwrap around the ankle to protect the skin and provide a base for the tape to stick to.
- Start the tape job by anchoring the tape on the top of the foot, just below the toes, and wrap it around the back of the heel.
- Continue wrapping the tape around the ankle and make figure-eight patterns, crossing over the medial and lateral sides of the ankle for support.
- Make sure the tape is firm but not too tight, as it should allow for some movement and flexibility.
- Finish the taping job by securing the tape at the top of the foot or just above the ankle with a final anchor.
- Trim any excess tape if necessary and smooth out any wrinkles to ensure a comfortable fit.
It is recommended to consult with a healthcare professional or athletic trainer for proper guidance and instruction on ankle taping technique.
How to ensure proper circulation when taping your ankle?
To ensure proper circulation when taping your ankle, follow these steps:
- Start by wrapping the ankle with a compression bandage or an underwrap. This will help prevent the tape from constricting blood flow.
- When applying the tape, make sure it is not too tight. You should be able to fit one finger comfortably between the tape and your skin.
- Avoid wrapping the tape too tightly around the ankle joint. Instead, wrap the tape in a figure-eight pattern, starting at the bottom of the foot and working your way up towards the shin.
- Check for any signs of numbness, tingling, or discoloration in the foot or toes. If you experience any of these symptoms, loosen the tape immediately.
- If you are unsure about how to properly tape your ankle, seek guidance from a healthcare professional or athletic trainer.
By following these steps, you can ensure proper circulation and avoid any potential complications when taping your ankle.
How to tape your ankle for different types of sports activities?
- Basketball: Start by wrapping the athletic tape around your foot a few times to secure the tape in place. Then, wrap the tape around the ankle in a figure-eight pattern, starting on the inside of the ankle and wrapping around the back of the heel, then crossing over to the outside of the ankle and wrapping around the front of the foot. Continue wrapping the tape in this figure-eight pattern, making sure to overlap each layer by about half the width of the tape. Finish by securing the tape with a few more wraps around the foot.
- Running: Begin by wrapping the athletic tape around the foot a few times to create a base. Then, wrap the tape around the ankle in a spiral pattern, starting at the base of the foot and working your way up towards the calf. Make sure to overlap each layer of tape by about half the width of the tape. Continue wrapping the tape in this spiral pattern until you reach the desired level of support. Finish by securing the tape with a few more wraps around the foot.
- Soccer: Start by wrapping the athletic tape around the foot a few times to secure the tape in place. Then, wrap the tape around the ankle in a figure-eight pattern, starting on the inside of the ankle and wrapping around the back of the heel, then crossing over to the outside of the ankle and wrapping around the front of the foot. Continue wrapping the tape in this figure-eight pattern, making sure to overlap each layer by about half the width of the tape. Finish by securing the tape with a few more wraps around the foot.
- Tennis: Begin by wrapping the athletic tape around the foot a few times to create a base. Then, wrap the tape around the ankle in a spiral pattern, starting at the base of the foot and working your way up towards the calf. Make sure to overlap each layer of tape by about half the width of the tape. Continue wrapping the tape in this spiral pattern until you reach the desired level of support. Finish by securing the tape with a few more wraps around the foot.
Remember to always consult with a healthcare professional before taping your ankle or beginning a new sports activity to ensure you are using the correct technique and level of support.
How often should I tape my ankle for support?
It is recommended to tape your ankle for support only when necessary, such as during physical activity or if you are recovering from an ankle injury. Taping your ankle too frequently can weaken the muscles and ligaments in the area and may lead to further injury. Consult with a healthcare professional or a physical therapist for guidance on when and how to tape your ankle for support.
How to properly prepare your ankle before taping?
Before taping your ankle, it is important to properly prepare it to ensure the tape adheres well and provides the necessary support. Here are some steps to follow in order to prepare your ankle properly:
- Clean the skin: Start by washing the area around your ankle with soap and water to remove any dirt, sweat, or oils that could affect the tape's ability to stick. Make sure to thoroughly dry the area before applying the tape.
- Shave if necessary: If you have hair on your ankle, it may be helpful to shave the area before taping. This will ensure better adhesion and prevent the tape from pulling on hair when removed.
- Check for cuts or abrasions: Inspect your skin for any cuts, scrapes, or other open wounds that could be irritated by the tape. If you have any open wounds, it is best to wait until they are fully healed before applying tape.
- Apply pre-wrap or underwrap: To protect your skin and make it more comfortable to remove the tape later, consider applying a layer of pre-wrap or underwrap to the area. This thin layer of foam or cloth will provide a barrier between your skin and the tape.
- Stretch and warm up: Before taping your ankle, it can be helpful to gently stretch and warm up the muscles and ligaments in the area. This will help to improve circulation and flexibility, making it easier to apply the tape smoothly.
By following these steps to properly prepare your ankle before taping, you can ensure that the tape provides the support and stability you need while also minimizing the risk of skin irritation or discomfort.
How to troubleshoot common issues with ankle taping?
- Check the materials: Make sure you are using quality sports tape that is suitable for use on skin. Using poor quality tape can lead to it not sticking properly or causing irritation.
- Clean and dry the skin: Ensure that the skin is clean and dry before applying the tape. Any dirt or moisture can prevent the tape from sticking properly.
- Apply the tape with proper tension: Make sure you apply the tape with the right amount of tension. It should be snug but not too tight that it cuts off circulation.
- Use the correct taping technique: There are different taping techniques for different ankle issues. Make sure you are using the correct technique for your specific problem.
- Check for proper tape positioning: Double-check that the tape is applied in the correct position and is not twisted or bunched up.
- Reapply if necessary: If the tape starts to peel or come loose, remove it and reapply fresh tape. It is important to have continuous support for your ankle.
- Avoid over-taping: Taping too frequently or too tightly can lead to skin irritation and discomfort. Give your skin time to breathe between taping sessions.
- Seek professional help: If you are still experiencing issues with ankle taping, it may be best to seek advice from a sports therapist or physical therapist who can provide personalized guidance and recommendations.