Best Outdoor Bluetooth Speakers in July 2026
Soundcore Boom 2 By Anker, Outdoor Speaker, 80W, Subwoofer, BassUp 2.0, 24H Playtime, IPX7 Waterproof, Floatable, RGB Lights, USB-C, Custom EQ, Portable for Camping and Beach - Black
- FEEL THE BASS ANYWHERE: DEEP, PUNCHY BASS FOR OUTDOOR ADVENTURES.
- ALL-DAY SOUND: 24-HOUR PLAYTIME AND PORTABLE POWER BANK FEATURE.
- WATERPROOF & FLOATABLE: IPX7 RATING; IDEAL FOR POOL, BEACH, AND RAIN.


Anker Soundcore 2 Portable Bluetooth Speaker with Stereo Sound, Bluetooth 5, Bassup, IPX7 Waterproof, 24-Hour Playtime, Wireless, Speaker for Home, Outdoors, Travel
-
IPX7 WATERPROOF: ENJOY MUSIC ANYTIME, ANYWHERE WITHOUT WORRY!
-
24-HOUR BATTERY: NON-STOP TUNES FOR YOUR OUTDOOR ADVENTURES!
-
POWERFUL SOUND: EXPERIENCE INTENSE BASS AND DISTORTION-FREE AUDIO!
Bluetooth Speaker, 20W HD Sound, Portable Wireless, IPX5 Waterproof, Up to 24H Playtime, TWS Pairing, for Home/Party/Outdoor/Camping/Beach Essentials, Electronic Gadgets, Birthday Gift (Black)
- IMMERSIVE STEREO SOUND: CONNECT TWO SPEAKERS FOR A POWERFUL EXPERIENCE!
- DURABLE & WEATHERPROOF: ENJOY MUSIC ANYWHERE WITH TOUGH, SPLASH-RESISTANT DESIGN.
- 24-HOUR PLAYTIME: LONG-LASTING BATTERY AND BLUETOOTH 5.3 FOR EXTENDED RANGE.
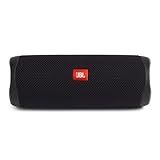
JBL FLIP 5, Waterproof Portable Bluetooth Speaker, Black, Small
- STREAM WIRELESS MUSIC ANYWHERE WITH PREMIUM JBL SOUND!
- ENJOY 12 HOURS OF PLAYTIME, RAIN OR SHINE, WITH IPX7 WATERPROOFING.
- PARTY BOOST: PAIR MULTIPLE SPEAKERS FOR AN EPIC SOUND EXPERIENCE!
Ortizan Portable Bluetooth Speaker (1st Gen), IPX7 Waterproof, Wireless, Big Sound and Deep Bass, TWS Pairing, 30Hrs of Playtime, for Home/Party/Outdoor/Beach, Birthday Gifts for Men Women - Black
- EXPERIENCE CINEMA-QUALITY SOUND WITH DUAL PAIRING FOR ULTIMATE IMMERSION!
- TRANSFORM ANY PARTY WITH VIBRANT RGB LIGHTS THAT SYNC TO YOUR MUSIC!
- ENJOY WORRY-FREE OUTDOOR FUN WITH IPX7 WATERPROOF DESIGN & 30-HOUR PLAY!
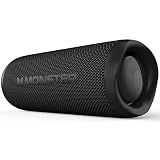
Monster Bluetooth Speaker, Wireless Portable Outdoor Bluetooth Speakers, 60W True Wireless Stereo IPX8 Waterproof, Dual PairingBluetooth 5.4 Built-in Mic, Black
-
SEAMLESS CONNECTIVITY: ENJOY FAST PAIRING AND STABLE STREAMING UP TO 33 FT.
-
IMMERSIVE SOUND: EXPERIENCE 360° HI-FI STEREO FOR RICH, CLEAR AUDIO.
-
DURABLE & WATERPROOF: PERFECT FOR OUTDOOR FUN WITH IPX8-RATED PROTECTION.
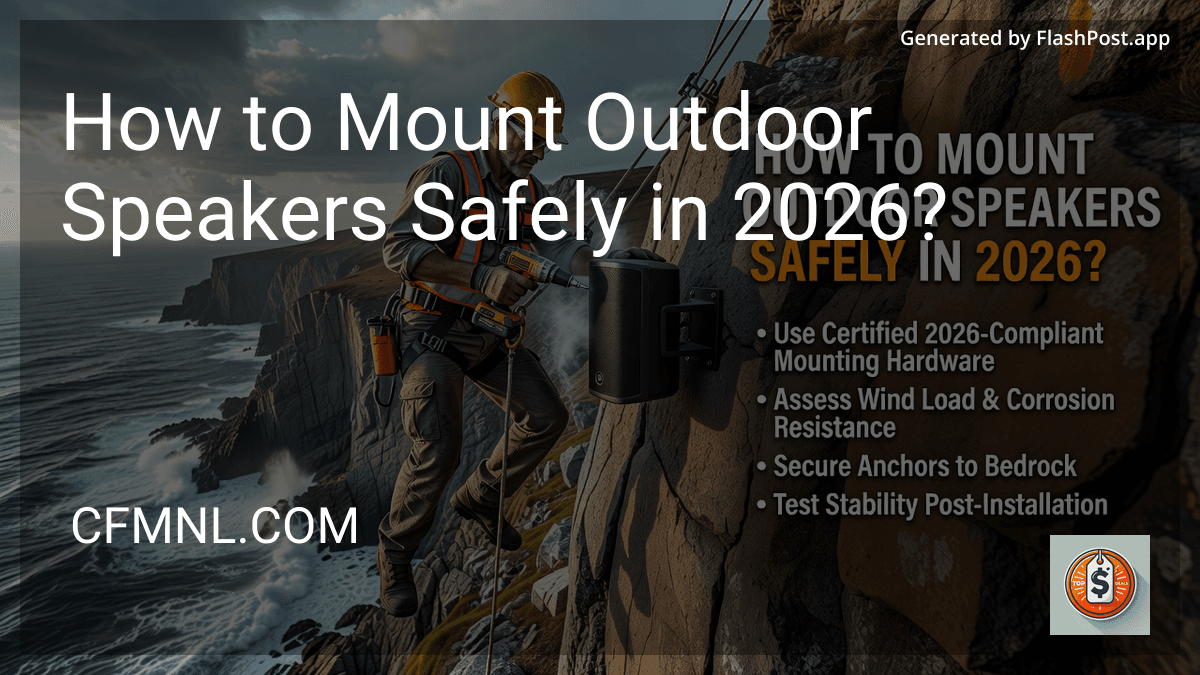
How to Mount Outdoor Speakers Safely in 2026? It’s a simple question, but one wrong screw, one bad bracket, or one poorly sealed cable run can turn a great backyard upgrade into a damaged wall, failed speaker, or serious safety hazard.
I’ve mounted outdoor speakers on stucco patios, wood pergolas, brick facades, and covered porches, and the biggest mistake I see is people treating them like indoor bookshelf speakers with a weatherproof label. Outdoor installs demand more planning, better hardware, and smarter placement.
The good news? If you understand the load, surface, wiring path, and weather exposure, you can get a clean, secure setup that sounds better and lasts longer. Below, you’ll learn How to Mount Outdoor Speakers Safely in 2026?, what gear actually matters, where most DIY installs go wrong, and how to set yours up with confidence.
Why How to Mount Outdoor Speakers Safely in 2026? matters more than ever
Outdoor audio has changed fast.
More homeowners now want patio speakers, deck speaker installation, and whole-yard listening zones that connect with smart devices, streaming apps, and multi-room systems. At the same time, speaker designs are getting lighter, more connected, and more weather-resistant-but that doesn’t mean every install is automatically safe.
A speaker mounted outside has to deal with:
- Wind vibration
- Moisture and UV exposure
- Temperature swings
- Surface movement
- Rust and corrosion
- Cable strain
- Accidental impact
That’s why How to Mount Outdoor Speakers Safely in 2026? isn’t just about getting sound outdoors. It’s about protecting your home, your wiring, and the speaker itself.
How to Mount Outdoor Speakers Safely in 2026? Start with the right location
Before you drill anything, pick the mounting area carefully.
The best outdoor speaker placement usually gives you wide sound coverage, shorter cable runs, and some natural protection from rain and direct sun. Under eaves, covered patios, pergola beams, and porch ceilings are often better than fully exposed fence posts or open walls.
Here’s what I look for first:
1. Structural strength
Don’t mount to weak trim, thin siding alone, decorative fascia, or aging wood that crumbles under pressure. Your speaker bracket should anchor into something solid like a stud, masonry, structural beam, or approved mounting block.
If the surface flexes, the speaker will eventually loosen.
2. Weather exposure
Even weatherproof speakers benefit from partial shelter. The less direct rain, snow, and sun they take, the longer the grille, bracket, finish, and internal seals will hold up.
3. Listening height and angle
Most outdoor speakers perform best mounted 7 to 10 feet high, angled slightly toward the seating area. Too high and the sound gets thin. Too low and they’re easier to bump, grab, or soak.
4. Distance from power and signal sources
If you’re running speaker wire from an amplifier or receiver, keep your route efficient and protected. If you’re using a wireless model, you still need to think about power access, Wi-Fi or Bluetooth stability, and weather-safe charging or power management.
If you’re still comparing indoor and outdoor audio options, it helps to understand how modern wireless audio works. A basic grasp of bluetooth speakers technology makes placement and connectivity decisions much easier.
What to look for before mounting outdoor speakers
This is where safe installs are won or lost.
Use this checklist before you buy hardware or mark drill points.
-
Outdoor-rated speaker brackets
Not all brackets are equal. Look for corrosion-resistant mounting hardware, adjustable tilt/swivel design, and a weight rating above your speaker’s actual load. -
Surface-compatible anchors
Brick, concrete, wood studs, metal framing, and stucco all require different fasteners. Using the wrong anchor is one of the fastest ways to create a failure point. -
Speaker weight and load capacity
Always confirm the speaker’s weight and the bracket’s maximum capacity. I like a safety margin of at least 25% to 50% above the speaker’s actual weight. -
IP weather resistance rating
Check for a meaningful IP rating or clear outdoor-use certification. Water resistance matters, but so does protection against dust, humidity, and temperature shifts. -
UV-resistant materials
Plastic housings, cable jackets, and rubber seals degrade in sunlight. UV-resistant components hold up much better over multiple seasons. -
Outdoor speaker wire protection
If you’re hardwiring, use outdoor-rated speaker wire, cable clips, conduit where needed, and drip loops to reduce water intrusion risk. -
Rust-resistant screws and fasteners
Stainless or corrosion-resistant fasteners are worth it. Cheap screws often fail before the speaker does. -
Vibration control
Some mounting surfaces amplify rattle. Use proper washers, bracket pads, or isolation accessories if needed. -
Drainage and orientation
Never mount a speaker in a way that traps water around ports, seams, or wire entries. -
Code and safety considerations
If your install involves new power lines, exterior outlets, or complex routing, check local electrical rules or bring in a licensed pro.
The real benefits of learning How to Mount Outdoor Speakers Safely in 2026?
Safe mounting doesn’t just prevent accidents. It improves the whole experience.
Better sound where you actually sit
A well-angled speaker throws sound across your patio or yard instead of blasting one chair and leaving the rest in a dead zone. Proper placement gives you more even coverage at lower, more comfortable volume.
Longer speaker lifespan
Sun, rain, loose brackets, and cable stress kill outdoor speakers early. A safer install reduces wear on the housing, drivers, terminals, and mounting points.
Less maintenance later
Nobody wants to re-tighten a bracket every month or troubleshoot crackling audio because water got into a poorly sealed wire run. Do it right once, and you avoid that cycle.
Cleaner backyard aesthetics
Secure brackets, hidden cable management, and intentional placement make your setup look built-in instead of improvised. That matters more than people think.
Lower risk of damage or injury
This is the big one. A fallen speaker can damage siding, crack tile, wreck furniture, or injure someone below.
How to Mount Outdoor Speakers Safely in 2026? Step-by-step expert method
This is the process I trust for most residential installs.
Step 1: Map your listening zone
Stand where people will actually sit-grill area, dining table, pool edge, fire pit, or lounge chairs. Then aim for stereo balance and broad coverage instead of maximum volume.
For larger spaces, two smaller speakers placed correctly often sound better than one oversized unit mounted too high.
Step 2: Inspect the mounting surface
Use a stud finder for wood-framed walls, tap and test masonry, and verify the surface is dry and stable. On stucco, I’m extra careful because the outer layer can crack if drilled or anchored incorrectly.
If you’re unsure what’s behind the wall, stop and check. Guessing is expensive.
Step 3: Mark bracket holes precisely
Hold the bracket in place, confirm level, and mark pilot points carefully. I always double-check angle and seating coverage before drilling because tiny changes at the bracket become big changes in sound direction.
Step 4: Drill the right pilot holes
Use the proper bit for the surface. Don’t oversize the hole, and don’t force anchors that don’t fit.
A loose anchor might feel okay on day one, then fail after a few hot-cold weather cycles.
Step 5: Install corrosion-resistant hardware
Secure the bracket firmly, but don’t overtighten to the point of damaging the surface or crushing a spacer. On masonry, consistency matters more than brute force.
Step 6: Route and secure wiring safely
For wired outdoor audio, keep cable runs tidy and protected. Use UV-resistant cable clips, outdoor conduit where needed, and leave a drip loop so water doesn’t travel along the wire into the connection point.
Step 7: Mount the speaker and test stability
Once the speaker is attached, gently apply pressure from multiple directions. There should be no wobble, twist, or shift.
If it moves now, it’ll move more later.
Step 8: Angle for sound, then test at real volume
Play music at the volume you’ll actually use outdoors. Walk the area and listen for hot spots, weak zones, or harsh reflections off glass, stucco, or hard patio surfaces.
Wired vs wireless outdoor speakers: which is safer and easier?
It depends on your setup.
Wired outdoor speakers usually offer the cleanest long-term reliability for fixed installation. They’re ideal for permanent patio audio systems, especially if you want consistent performance and fewer connectivity issues.
Wireless or Bluetooth outdoor speakers can be easier for renters, temporary spaces, or lighter-use setups. But they still need stable mounting, safe power planning, and weather-aware placement.
If you’re exploring wireless options before committing to a fixed system, these guides on the best bluetooth speakers for home and a practical bluetooth speakers pairing guide can help you compare flexibility versus permanence.
Common mistakes people make with outdoor speaker mounting
I’ve seen every one of these in the wild.
Mounting only into siding
Siding is not structure. It may cover the wall, but it should not be the thing carrying the load.
Ignoring water paths
Rain doesn’t fall straight in real life. Wind drives moisture sideways and upward, especially around corners and overhangs.
Using indoor hardware outside
Indoor screws rust. Standard brackets seize up. Cheap anchors loosen fast.
Aiming speakers straight down
A dramatic downward tilt often creates harsh, narrow sound and puts strain on the bracket. A subtle angle works better.
Running exposed wire carelessly
Loose wire looks bad and fails faster. It also creates snag points and moisture risks.
Skipping a post-install inspection
Outdoor mounts should be checked after the first few weeks, then seasonally after that.
Pro tips for How to Mount Outdoor Speakers Safely in 2026?
This is the stuff most quick guides leave out.
Pro tip: If your mounting surface gets intense afternoon sun, avoid placing the speaker where heat reflects off nearby glass or metal. That extra radiant heat can shorten the life of seals and finishes faster than direct sun alone.
Here are a few more expert recommendations:
- Use a cardboard mockup first. Tape a speaker-sized template to the wall and check sightlines, clearance, and angle before drilling.
- Plan for service access. Leave enough room to adjust brackets, inspect wiring, or remove the speaker later.
- Think seasonally. A spot that seems protected in summer may get wind-driven rain in winter.
- Don’t chase max volume. Good placement beats brute loudness almost every time.
- Test with actual outdoor noise. HVAC hum, pool pumps, traffic, and neighborhood sounds affect how your system feels in real use.
💡 Did you know: Many “bad speaker” complaints outdoors are really placement and mounting problems, not speaker quality issues. Even excellent weatherproof audio gear underperforms if it’s mounted too high, too exposed, or too far apart.
If portability matters more than permanent installation, it’s worth comparing fixed mounts with current waterproof portable bluetooth speaker reviews or checking a strong waterproof portable bluetooth speaker 2026 option for flexible backyard use.
How to get started with outdoor speaker installation
Don’t overcomplicate the first step.
Start with a quick plan built around these four questions:
-
Where do you want the sound most?
Patio dining, poolside, garden seating, or a full backyard zone? -
Will the speakers stay mounted year-round?
Permanent installs need more durable hardware and smarter weather planning. -
Are you going wired or wireless?
Wired means cleaner permanence. Wireless means easier setup but more power and connectivity considerations. -
What surface are you mounting to?
Wood, brick, stucco, concrete, and metal all change the installation method.
From there, your action path is simple:
- Measure the space
- Choose outdoor-rated speakers and brackets
- Confirm structural anchor points
- Plan cable or power routing
- Mount carefully
- Test stability and sound coverage
- Recheck after the first storm or major temperature swing
If any part of the job feels uncertain-especially drilling masonry, routing exterior power, or mounting at height-bring in a qualified installer. Safe beats sorry every time.
You don’t need a complicated backyard audio blueprint to get great results. You just need the right location, the right hardware, and the discipline to mount it properly. Take a close look at your space, choose weather-ready gear, and make your first install decision based on safety before style. That’s how you get outdoor sound you’ll enjoy for years, not just one season.
Frequently Asked Questions
how high should outdoor speakers be mounted?
Most outdoor speakers work best mounted around 7 to 10 feet high, depending on the size of the space and seating layout. That height usually gives you better sound spread while keeping the speakers safer from bumps, splashes, and tampering.
can you mount outdoor speakers under a covered patio?
Yes, and it’s often one of the best places to install them. A covered patio offers partial weather protection, easier cable management, and more predictable sound coverage than fully exposed mounting spots.
what screws should I use for outdoor speaker mounting?
Use corrosion-resistant or stainless outdoor-rated screws matched to your wall type and bracket specs. The right screw matters just as much as the bracket because improper fasteners are a common cause of speaker failure.
are wireless outdoor speakers better than wired ones for a backyard?
Wireless outdoor speakers are easier to set up and great for flexible use, but wired speakers are usually better for permanent installations and consistent performance. If you want a fixed patio audio system with fewer dropouts, wired often wins.
do I need a professional to install outdoor speakers?
Not always, especially for simple mounts into solid wood framing with safe wire routing. But if you’re drilling into masonry, working at height, adding outdoor power, or unsure about structural support, hiring a professional is the smarter move.